Mold Remediation Deltona FL – Causes, Symptoms, Prevention, and Treatment

deltona fl mold removal
Black mould is a common household problem that can not only damage your property but also pose significant health risks if left untreated. Understanding its causes, symptoms, preventive measures, and treatment options can help you maintain a healthy living environment while protecting your home.

Causes of Black Mould on Walls

Black mould thrives in areas with excessive moisture and poor ventilation.

  • High humidity levels:Humid conditions provide the perfect environment for mould spores to grow.
  • Condensation:When warm, humid air comes into contact with cold surfaces like walls or windows, condensation forms and creates damp areas where mould can develop.
  • Insufficient ventilation:Poor airflow in rooms like bathrooms and basements traps moisture and creates ideal conditions for black mould.
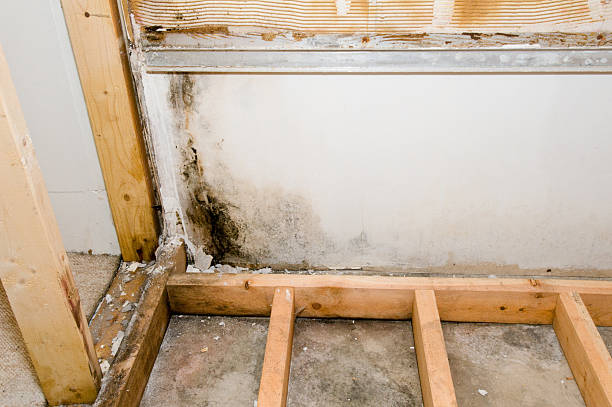
  • Flooding or water damage:If water-soaked surfaces are not dried quickly and thoroughly after flooding or leaks, mould can begin to grow within 24–48 hours.

Symptoms of Black Mould on Walls

Identifying black mould early is crucial for effective treatment.

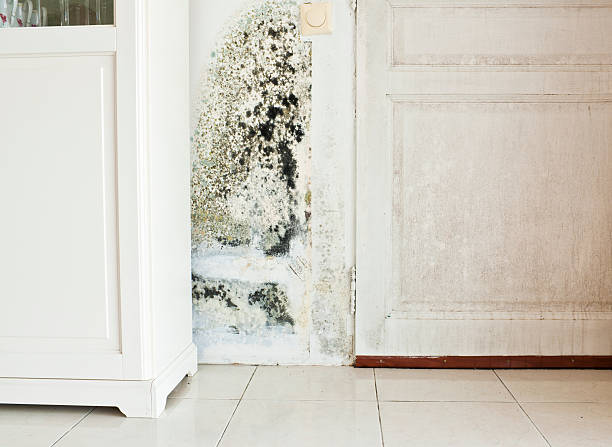
  1. Dark patches or spots:Black or greenish stains appear on walls, ceilings, or other surfaces.
  2. Musty odour:A persistent damp smell often indicates hidden black mould.
  3. Peeling paint or wallpaper:Moisture buildup behind walls may cause the outer layers to loosen or peel away.
  4. Health issues in residents:Prolonged exposure may lead to respiratory problems, allergies, skin irritation, or worsening asthma symptoms.

Preventing Black Mould

Prevention is key to stopping black mould from appearing in the first place.

  • Monitor indoor humidity levels with a hygrometer and keep them below 50%.
  • Use dehumidifiers in high-humidity areas like basements.
  • Ensure proper ventilation by installing exhaust fans in bathrooms and kitchens.
  • Repair leaks promptly to prevent water accumulation behind walls or under floors.
  • Clean condensation from windowsills regularly using a dry cloth.
  • Insulate cold surfaces such as exterior walls to reduce condensation risk.
Issue Solution
High humidity Install dehumidifiers or improve ventilation
Water leaks Fix plumbing issues promptly
Poor ventilation Open windows/use exhaust fans
Condensation spots Regular cleaning/insulation

Treating Black Mould on Walls

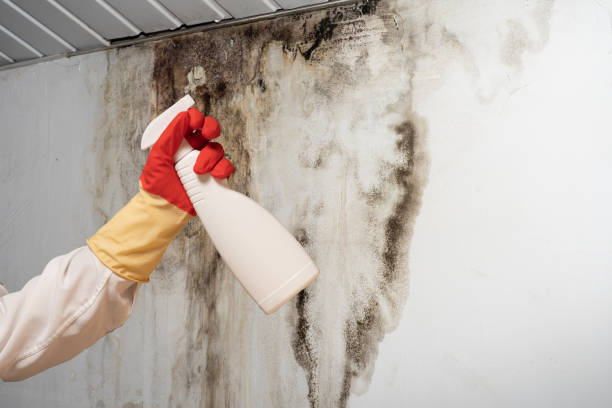
  1. For small patches (under 1m²), you can attempt removal yourself using household products like white vinegar diluted with water or specialist anti-mould sprays.
  2. For larger infestations or extensive structural damage caused by water intrusion, seek professional assistance.
  3. Gloves (rubber/neoprene)
  4. Safety goggles
  5. Face mask/respirator (N95 recommended)
  6. Scrub brush/sponge
  7. Plastic sheets (to contain spores)
  8. Remove visible surface mould:Gently scrub affected areas using an anti-microbial cleaner while ensuring minimal disturbance of spores.
  9. Dispose of contaminated materials:Any porous materials like drywall that cannot be thoroughly cleaned should be removed and replaced.
  10. Dry thoroughly: Use fans/heaters after cleaning treatments ensure no remaining dampness lingers behind cleaned spaces creating reoccurring cycles later days ahead

Effective Mold Removal Deltona FL: Safely Eliminate Black Mould from Walls and Surfaces

Black mould can be both unsightly and hazardous to your health. It thrives in damp, humid conditions, making walls and surfaces vulnerable if moisture is left unchecked. Safely removing black mould requires proper preparation, tools, and techniques to ensure it is completely eradicated without harming your health or damaging the structure of your home: www.deltonamoldremoval.org

Preparation: What You Need Before Addressing Black Mold Deltona FL

Before attempting to remove black mould, gather the necessary tools and protective equipment. This ensures safety while minimizing the spread of mould spores during the cleaning process.

Protective Equipment: – Rubber gloves (preferably non-porous) – Protective goggles – Face mask or respirator (N95 or equivalent)

Cleaning Supplies: – White vinegar or a commercial mould remover – Baking soda – Mild detergent – Warm water – Spray bottle – Scrubbing brush or sponge – Disposable cloths or paper towels

Ensure that the area you’re working in is well ventilated by opening windows and doors. If possible, isolate the affected area by closing off uninfected spaces to prevent spores from spreading.

Essential Steps for Mold Inspection Deltona FL

  1. Assess the Extent of Mould Growth:
    Inspect the infected area carefully. If mould covers an area greater than 10 square feet (approximately 1 square meter), consider consulting a professional as extensive growth may require specialized treatment.
  2. Mix one part white vinegar with one part water in a spray bottle for an effective natural cleaner.
  3. Alternatively, you can use baking soda mixed with water for scrubbing stubborn patches.
  4. Apply Cleaning Solution:
    Spray your chosen solution directly onto the mouldy surface and let it sit for 10–15 minutes. This helps loosen spores and break down their growth structure.
  5. Scrub the Affected Area:
    Use a scrubbing brush or sponge to clean away visible mould patches. Avoid applying excessive pressure on painted walls to prevent damage.
  6. Rinse Thoroughly:
    Wipe down the cleaned surface with a damp cloth soaked in warm water to remove any residue of cleaning agents and dislodged spores.
  7. Dry Completely:
    Use disposable towels or allow natural air circulation to thoroughly dry all cleaned areas—mould thrives on moisture, so this step is critical.

Effective Post-Cleaning Measures for Mold Testing Deltona FL

Maintain Proper Ventilation:– Install exhaust fans in bathrooms and kitchens. – Keep windows open when possible to reduce indoor humidity levels.

Address Moisture Issues:– Use dehumidifiers in particularly humid areas like basements.

Regular Check-Ups:Inspect high-risk areas regularly (e. g. , around windowsills or near plumbing) for early signs of dampness or discolouration that may indicate returning mould growth.

Risk Factor Prevention Tip
High Humidity Use dehumidifiers
Poor Ventilation Open windows; install exhaust fans
Plumbing Leaks Repair leaks immediately

By adhering strictly to these guidelines for safe removal as well as prevention strategies, you can effectively eliminate black mould while protecting both your home environment and overall health from its harmful effects.

Finding a Trusted Mold Removal Company Deltona FL to Address Black Mould Exposure Risks

Black mould, scientifically known as Stachybotrys chartarum, poses significant health risks, especially when left untreated in indoor environments. The presence of black mould is not just a cosmetic problem—it can have serious implications for the health of individuals exposed to it over time. Below, we explore the health risks associated with black mould exposure and strategies to mitigate its impact.

Health Effects of Black Mould Exposure

Exposure to black mould can result in a variety of symptoms that range from mild to severe. These effects often depend on an individual’s sensitivity, existing respiratory conditions, or duration of exposure.

  • Nasal congestion
  • Frequent coughing or sneezing
  • Shortness of breath or wheezing
  • Skin irritation or rashes
  • Itchy eyes and throat
  • Persistent headaches or sinus discomfort
  • Chronic Health Conditions (due to prolonged exposure):
  • Aggravated asthma symptoms
  • Development of bronchitis-like conditions
  • Risk of fungal infections in immunocompromised individuals

Vulnerable Groups at Higher Risk

  • Children and Infants: Developing respiratory systems make them more likely to experience severe allergic reactions.
  • Elderly Individuals: Their immune systems are often less capable of fighting off allergens or irritants present in mould spores.
  • People with Respiratory Conditions: Those diagnosed with asthma, COPD (chronic obstructive pulmonary disease), or other lung-related illnesses may find their symptoms exacerbated.
  • Immunocompromised Individuals: Cancer patients undergoing chemotherapy, organ transplant recipients, and those living with autoimmune diseases face an elevated risk.

How Black Mould Impacts Indoor Air Quality

Mould releases microscopic spores into the air that can infiltrate HVAC systems and spread throughout your home.

  1. Allergic reactions for sensitive individuals.
  2. The development of “sick building syndrome,” where prolonged time indoors triggers persistent illness-like symptoms.
  3. The accumulation of mycotoxins—secondary metabolites produced by certain types of fungi—which may lead to toxic effects when inhaled over long periods.
Health Effect Short-Term Symptoms Long-Term Symptoms
Allergic Reactions Sneezing, itchy skin/eyes Chronic sinus infections
Respiratory Irritation Coughing, nasal congestion Asthma exacerbation
Toxicity from Mycotoxins Dizziness, fatigue Potential neurological damage

Preventative Measures for Reducing Health Risks

  1. Use dehumidifiers in high-humidity areas such as basements.
  2. Repair leaks promptly in roofs, pipes, or walls.
  3. Install ventilation fans in bathrooms and kitchens.
  4. Open windows periodically to encourage airflow.
  5. Perform routine checks for water damage.
  6. Inspect hidden areas such as behind furniture or under sinks where mould might grow unnoticed.
  7. Address spills immediately using appropriate cleaning agents (e. g. , vinegar solutions).
  8. Regularly clean high-risk areas such as tile grout and shower caulking.
  9. Professional Assistance When Needed: If you suspect extensive mould growth beyond what you can safely manage yourself, consult qualified remediation experts who specialize in safe removal techniques while protecting indoor air quality.

Understanding these risks helps homeowners take proactive steps towards creating safer living spaces while ensuring long-term well-being for all occupants indoors.

How to Remove Black Mould from Bathrooms and Prevent Recurrence

Black mould, particularly in bathrooms, can be a persistent and frustrating problem due to the high levels of moisture often present in these spaces. By addressing the root causes and applying effective removal techniques, you can eliminate mould growth and prevent its return. Below is a detailed guide on how to remove black mould from bathrooms and ensure it doesn’t come back.

Causes of Black Mould in Bathrooms

Bathrooms provide an ideal environment for black mould due to: – Excessive moisture:Frequent use of showers or baths increases humidity levels.Poor ventilation:Lack of airflow allows condensation to linger on walls, ceilings, and fixtures.Leaking fixtures or pipes:Hidden leaks create damp conditions that promote mould growth.Soap scum build-up:Mould feeds on organic matter like soap residue.

Understanding these causes is essential for both removal efforts and preventative strategies.

Steps for Removing Black Mould in Bathrooms

  1. Protective gear: gloves, safety goggles, and an N95 mask.
  2. Cleaning tools: scrub brush, sponge, microfiber cloths.
    • Commercial anti-mould sprays.
    • DIY mixture: 1 part white vinegar with 1 part water or a mixture of baking soda and water.
  3. Ensure good ventilation by opening windows or running the bathroom fan.
  4. Remove items like shower curtains, rugs, or towels that may have been exposed to mould. Wash them with hot water and detergent.
  5. Spray the affected areas (e. g. , tiles, grout lines) with your chosen cleaning solution.
  6. Allow it to sit for 10–15 minutes to break down the mould spores.
  7. Use a stiff-bristled brush or sponge to scrub away visible mould.
  8. Pay special attention to grout lines where mould tends to embed deeply.
  9. Rinse cleaned surfaces thoroughly with warm water.
  10. Wipe all areas dry using clean cloths or towels since lingering moisture encourages new growth.
  11. Place used sponges, paper towels, or any disposable materials in sealed trash bags before discarding them to avoid spreading spores.

Tips for Preventing Black Mould Recurrence

  • Improve Ventilation:Install an exhaust fan if one isn’t already present. Run it during and after showers for at least 15–20 minutes.
  • Use Dehumidifiers:Maintain indoor humidity levels below 50% by using a dehumidifier in particularly damp bathrooms.
  • Fix Leaks Promptly:Inspect faucets, pipes, and other fixtures regularly for leaks that could create damp patches conducive to mould growth.
  • Use Anti-Mould Paints:
    Consider repainting bathroom walls with anti-microbial paints designed specifically for humid environments.
  • Regular Cleaning Routine:Clean tiles, grout joints, shower doors/curtains weekly using an anti-mould cleaner or natural alternatives like vinegar solutions.

Sample Prevention Schedule

Task Frequency
Ventilate the bathroom After each shower
Clean tiles & grout Weekly
Inspect plumbing & fix leaks Monthly
Deep clean corners & hidden areas Quarterly

By following these steps consistently and incorporating preventative measures into your routine, you can maintain a clean bathroom free from harmful black mould growth over time.

How to Remove Black Mould from Bathrooms and Prevent Recurrence

Black mould in bathrooms is a common issue due to the damp and humid environment. If left untreated, it can damage surfaces, reduce air quality, and pose health risks. This guide outlines how to remove black mould effectively and provides strategies for preventing it from returning.

Identifying Black Mould in Bathrooms

Before addressing black mould, it’s important to confirm its presence.

  • Dark patches or spots on walls, ceilings, tile grout, or around fixtures.
  • A musty odor lingering in the bathroom.
  • Discoloration of silicone sealants or caulking.

Tools and Materials You’ll Need

Having the right tools will make the removal process easier.

  • Protective gloves
  • Safety goggles
  • Respirator mask (to avoid inhaling spores)
  • Scrub brush or old toothbrush
  • Microfiber cloths
  • Spray bottle
  • A cleaning solution (e. g.

Step-by-Step Removal Process

  1. Ensure your bathroom is well-ventilated by opening windows or turning on an exhaust fan.
  2. Remove any loose items such as towels, shower curtains, bath mats, and toiletries to prevent contamination.
  3. Pour your chosen cleaning solution into a spray bottle for easy application.
  4. Spray directly onto the affected areas and let it sit for 10–15 minutes to break down the mould.
  5. Use a scrub brush or an old toothbrush to remove the mould from tile grout, silicone sealant edges, and other surfaces.
  6. For hard-to-reach crevices like corners of showers or under sinks, apply extra effort with smaller brushes.
  7. Wipe down surfaces with a damp microfiber cloth to remove any residue.
  8. Rinse thoroughly with clean water to ensure no traces of cleaning agents are left behind.
  9. Use dry microfiber cloths or towels to wipe all cleaned areas until they are free of moisture.
  10. Run an exhaust fan for at least 30 minutes after cleaning.

Preventing Black Mould Reappearance

Prevention Method Description
Improve Ventilation Install a bathroom exhaust fan or open windows regularly after bathing.
Fix Leaks Promptly Repair leaking pipes and faucets as soon as possible to curb excess moisture.
Use Mould Resistant Paint/Sealants Apply anti-mould paint on walls and reapply silicone caulks with fungicidal properties where needed.
Control Humidity Levels Use dehumidifiers if necessary to maintain indoor humidity below 60%.
Regular Cleaning Routine Clean tiles, grout lines, and other high-moisture areas weekly using vinegar solutions or similar products.

Additional Tips

  • Wash shower curtains frequently if they are prone to dampness.
  • Avoid leaving wet towels inside bathrooms; place them outside on racks where they can dry faster.
  • Consider investing in moisture-sensing devices that notify you when humidity levels are too high.

By following these steps diligently and maintaining healthy bathroom practices over time, you can effectively eliminate black mould while minimizing its chances of returning in the future.

Step-by-Step Guide on Removing Black Mould from Showers and Grout

Black mould can often thrive in the damp, humid environment of showers and grout lines. It not only looks unsightly but can also pose health risks if left untreated. Addressing this issue effectively requires a combination of cleaning, preventative measures, and proper maintenance. Below is a comprehensive step-by-step guide to help you eliminate black mould from your shower and grout.

Step 1: Gather Supplies

Before starting, ensure you have all necessary materials on hand to make the process seamless.

  • Protective gloves
  • Safety goggles or glasses
  • A face mask (preferably N95)
  • Scrub brush or old toothbrush for grout lines
  • Microfiber cloths or disposable rags
  • Baking soda
  • White distilled vinegar or hydrogen peroxide
  • A spray bottle
  • Mild detergent or bleach solution (optional)

Step 2: Protect Yourself and Ventilate the Area

Black mould spores can be harmful when inhaled or when they come into contact with skin. Wear gloves, goggles, and a mask during the cleaning process. Adequately ventilate your bathroom by opening windows or turning on an exhaust fan to minimize exposure to airborne mould spores.

Step 3: Prepare the Cleaning Solution

You can use natural solutions like baking soda with vinegar or opt for commercial mould removal products if preferred.

  1. Combine 1 part white vinegar with 2 parts water in a spray bottle.
  2. Add 1 tablespoon of baking soda for extra cleaning power.
  3. Use hydrogen peroxide directly without dilution.
  4. Pour into a spray bottle for easy application.

Step 4: Spray and Let it Sit

Evenly spray the solution onto the affected areas of the shower walls and grout lines where black mould is visible. Allow it to sit for at least 15–20 minutes to break down the mould while also killing its spores.

Step 5: Scrub Stubborn Mould Growth

Using a scrub brush or old toothbrush, gently scrub away any remaining mould from grout lines, tiles, and other surfaces. For tougher stains in grout, create a paste using baking soda and water; apply it to the area before scrubbing again.

Step 6: Rinse Thoroughly

Rinse off all cleaned surfaces with warm water to remove leftover cleaning residues along with loosened mould particles. Wipe dry using microfiber cloths to prevent moisture buildup.

Preventative Measures for Mould-Free Showers

  • Use an exhaust fan during showers and leave it running afterward for at least 10–15 minutes.
  • Keep windows open when possible to reduce humidity levels.
  • Clean grout lines weekly using vinegar or mild detergents.
  • Dry shower surfaces after each use with a squeegee or towel.
  • Apply a waterproof sealant every 6–12 months to protect grout from moisture intrusion.
Tip Details
Reduce Shower Humidity Invest in a dehumidifier if ventilation is limited.
Use Anti-Mould Paint Apply paint designed specifically to resist mould growth on walls near showers.

By following this guide consistently, you can keep your shower free from black mould while maintaining a healthy bathing environment over time.

Black Mould Caused by Condensation, Penetrating Damp, or Rising Damp: Key Differences and Solutions

When dealing with black mould in your property, understanding its root cause is crucial for effective removal and prevention. Black mould can result from three primary moisture problems: condensation, penetrating damp, or rising damp. Below is an explanation of these causes and practical solutions to address each issue.

Condensation: Causes and Solutions

What Causes Condensation?Condensation occurs when warm, moist air comes into contact with cold surfaces such as windows, walls, or poorly insulated areas. This often happens in spaces with poor ventilation like bathrooms, kitchens, or bedrooms.

Symptoms of Condensation-Induced Black Mould – Black spots on walls near windows – Fungus growth around window frames – Persistent damp odour – Water droplets on cold surfaces

Solutions for CondensationImprove Ventilation:Install extractor fans in kitchens and bathrooms or use dehumidifiers to reduce indoor humidity.Insulate Properly:Insulate external walls and windows to prevent cold surfaces where condensation forms.Control Indoor Humidity:Avoid drying clothes indoors without proper ventilation.Regular Cleaning:Use a mould-resistant cleaner on areas prone to condensation.

Penetrating Damp: Causes and Solutions

What Causes Penetrating Damp?Penetrating damp occurs when water leaks through the exterior of a building due to damaged roofs, gutters, cracked walls, or faulty plumbing. It is common in older buildings with degraded materials.

Symptoms of Penetrating Damp-Induced Black Mould – Localized patches of mould growth on walls – Discolouration or peeling paint – Wet patches after rainfall – Musty smell near affected areas

Additionally: – Consider applying a water-resistant coating on external walls. – Repoint brickwork if mortar has deteriorated.

Rising Damp: Causes and Solutions

What Causes Rising Damp?Rising damp occurs due to groundwater seeping up through the foundation of a building. This happens when there is no effective damp-proof course (DPC) in place or if the DPC has failed over time.

Symptoms of Rising Damp-Induced Black Mould – Black mould forming near skirting boards – Tide marks up to 1 meter above floor level – Flaking plaster – A white powdery substance (salts) on the wall’s surface

Solutions for Rising Damp1.Install/Repair DPC:Add or restore a physical or chemical damp-proof course to act as a barrier against groundwater. 2.Improve Drainage Around the Property:Ensure proper drainage systems are in place to divert water away from foundations. 3.Replace Affected Plaster:Remove damaged sections of plaster and replace them with moisture-resistant materials. 4.Professional Assessment:Engage professionals for persistent issues requiring extensive work.

How to Determine Which Issue Is Causing Your Mould Problem

To effectively address black mould caused by moisture issues: 1. Inspect your property after rainfall (for penetrating damp). 2. Check for signs near ground level (for rising damp). 3. Observe whether it corresponds with daily activities like cooking/showering (for condensation).

By correctly identifying the source — condensation, penetrating damp, or rising damp — you can implement the appropriate solution tailored to your home’s specific needs while ensuring long-term prevention against black mould growth.

Effective Methods to Restore and Protect Your Home After Black Mould Removal

After successfully removing black mould from your home, restoration and preventive measures are essential to ensure that your space remains safe, clean, and free of future infestations. Black mould can cause damage not only to the structural integrity of your property but also to its aesthetic appeal. Implementing effective restoration techniques and prevention strategies will help maintain a healthy and mould-free living environment.

Inspecting and Repairing Damage

Once the black mould has been removed, it is critical to evaluate the extent of damage caused by the infestation. This includes both visible damage to walls, ceilings, or flooring as well as any hidden areas that may have been affected.

  • Inspect affected surfaces thoroughlyfor discoloration, warping, or deterioration.
  • Replace damaged materialssuch as drywall, plasterboard, or insulation that cannot be salvaged.
  • Repair leaks or cracksin walls, windows, pipes, or roofs that may have contributed to mould growth.

Improving Ventilation and Indoor Air Quality

A key step in protecting your home from future mould growth is improving airflow and reducing moisture levels indoors. Proper ventilation helps regulate humidity levels while preventing damp conditions conducive to mould spores.

  • Install exhaust fans in bathrooms and kitchens where moisture accumulation is common.
  • Open windows regularly to allow fresh air circulation.
  • Use dehumidifiers in rooms prone to high humidity (e. g. , basements or laundry rooms).
  • Ensure HVAC systems are cleaned and maintained regularly to prevent moisture buildup.

Sealing Surfaces with Mould Resistant Coatings

Applying specialist products designed for long-term protection can help reduce the risk of black mould reappearing after removal.

Product Type Benefits Application Areas
Anti-Mould Paint Prevents regrowth on painted surfaces Walls & ceilings
Waterproof Sealants Blocks moisture penetration Windowsills, grout lines
Fungicidal Coatings Creates a protective barrier against fungal spores Bathrooms & kitchens

Ensure these products are applied according to manufacturer instructions for maximum effectiveness.

Controlling Moisture Levels

Since black mould thrives in damp environments, addressing sources of excessive moisture is crucial for long-term protection.

  • Fix plumbing issues promptly (e. g. , leaking pipes or faucets).
  • Maintain gutters and downspouts to direct water away from the property.
  • Use waterproof membranes in areas prone to water ingress (such as basements).

Regular Cleaning Practices

Consistent cleaning routines are necessary to minimize dirt buildup that can harbor mould spores.

  1. Clean bathroom tiles with fungicidal sprays weekly.
  2. Wipe down windowsills where condensation tends to accumulate.
  3. Vacuum carpets regularly using HEPA filters.

Monitoring for Early Signs of Mould

  • Look out for discoloration on corners or behind furniture.
  • Check damp-prone areas like bathrooms or basements monthly.
  • Use a hygrometer to monitor indoor humidity levels (ideally between 30%-50%).

By following these methods diligently, you can restore your home’s integrity while significantly reducing the risk of black mould returning. Prioritizing preventive measures ensures not only a healthier living environment but also protects your investment in the long term.


Tags:

Comprehensive Guide to Mold Removal Deltona FL: How Experts Handle the Process

Mold Mould Stains on Damp Wall and Door behind Cabinet Mold or Mould Stains on Damp Wall and Door behind Cabinet due to condensation caused by lack of ventilation. black mold stock pictures, royalty-free photos & images

Mold remediation is a critical process that ensures the removal of mold from affected spaces while minimizing health risks and preventing further contamination. This guide provides an in-depth look at how experts approach mold remediation, using industry-standard practices to ensure effective results.

What Is Mold Remediation?

Mold remediation refers to the professional removal, cleaning, and treatment of mold-infested areas. It is more than just scrubbing away visible mold; it involves addressing underlying causes, correcting moisture issues, and ensuring that mold does not return. The goal is to restore a safe and healthy environment for occupants.

Key Components of the Mold Remediation Process

  1. Experts conduct a thorough inspection to identify the type and extent of mold growth.
  2. Moisture mapping tools are often used to locate hidden dampness, as moisture is essential for mold growth.
  3. Air quality testing may be performed to evaluate spore concentration levels.
  4. Containment procedures prevent the spread of spores during cleanup.
  5. Negative air pressure systems, plastic sheeting barriers, and sealing off HVAC vents are commonly used methods.
  6. Non-porous materials (such as glass or metal) can often be cleaned thoroughly.
  7. Porous materials like drywall, carpets, or insulation may need to be removed entirely if heavily contaminated.
  8. Specialized antimicrobial solutions are used to clean surfaces and destroy remaining spores.
  9. HEPA vacuuming eliminates loose spores from surfaces and air ducts.
  10. Industrial-grade dehumidifiers and air movers are employed to remove moisture from affected spaces quickly.
  11. After treatment, professionals conduct follow-up inspections or air tests to confirm successful remediation.
  12. Clearance testing ensures safe re-occupancy of the space.

Why Professional Expertise Matters

  • Specialized Tools: Professionals use advanced equipment like infrared cameras, HEPA vacuums, and negative air machines tailored for effective mold removal.
  • Health Safety: Incorrect handling can lead to exposure risks such as respiratory problems or allergic reactions.
  • Root Cause Identification: Experts address underlying water infiltration issues preventing future infestations.

Common Challenges in Mold Remediation

Even with professional intervention, certain challenges can arise during the process: | Challenge | Impact | Resolution | |——————————————-|—————————————–|—————————————–| | Identifying Hidden Mold | Hidden growth complicates removal | Use advanced detection tools | | Cross-Contamination Risks | Spreading spores into adjacent areas | Establish proper containment strategies | | Dealing with Extensive Structural Damage | Severe damage increases repair costs | Combine repairs with remediation efforts|

Benefits of Proper Mold Remediation

Addressing mold promptly offers several benefits: – Improved indoor air quality – Reduced health risks for occupants – Protection against structural deterioration – Restoration of property value

When handled correctly by trained professionals following industry standards like those outlined by IICRC (Institute of Inspection Cleaning and Restoration Certification), the process ensures a safe living or working environment free from harmful mold growths.

Essential Steps for Mold Remediation Deltona FL: From Inspection to Safe Re-Occupancy

Mold removal is a meticulous process requiring a combination of expertise, specialized tools, and adherence to industry standards. Each step in the mold remediation process is critical to ensure safe and effective removal. Below, we delve into the key steps involved, highlighting their importance in achieving a mold-free environment.

Step 1: Initial Assessment and Inspection

  • Visual Inspection: Experts inspect areas prone to moisture or visible signs of mold growth.
  • Moisture Mapping: Utilizes tools like moisture meters to locate hidden dampness behind walls or under flooring.
  • Air Sampling: Determines spore concentration levels within indoor environments.
  • Surface Testing: Confirms the type of mold present on affected materials.

This comprehensive assessment ensures that no hidden mold colonies are overlooked and helps formulate an appropriate remediation plan.

Step 2: Containment Setup

  • Installing plastic sheeting barriers around contaminated areas.
  • Using negative air pressure machines with HEPA filters to ensure air flow moves inward but not outward.

Proper containment mitigates cross-contamination, protecting unaffected parts of the property.

Step 3: Mold Removal and Cleaning

  1. Mold on metal, glass, or tile can typically be scrubbed off using antimicrobial cleaners.
  2. HEPA vacuuming eliminates loose spores after cleaning.
  3. Carpets, drywall, or insulation often need to be removed entirely as they retain mold even after surface cleaning.
  4. Soft goods like furniture may require specialized treatments or disposal if heavily contaminated.
  5. All surrounding areas are thoroughly cleaned using HEPA vacuums and wet wiping with appropriate solutions to remove residual spores.

A focus on precision at this stage ensures that both visible mold and microscopic particles are addressed effectively.

Step 4: Drying and Dehumidification

Moisture control is critical post-removal. High-performance dehumidifiers are deployed along with industrial fans for thorough drying. This step reduces the likelihood of future growth by ensuring optimal indoor humidity levels are maintained below 50%.

Humidity Level Risk Factor
Above 60% High risk for mold growth
Between 50%-60% Moderate risk
Below 50% Safe range

Step 5: Verification (Clearance Testing)

  • Air sampling confirms acceptable spore counts.
  • Visual inspections check for any remaining signs of contamination or moisture issues.

Verification assures homeowners that their space is ready for safe reoccupation.

Step 6: Reoccupancy Preparation

After clearance testing passes, cleaned areas are restored as necessary (e.g., replacing drywall). Preventative measures like sealing cracks or improving ventilation systems may also be recommended by professionals at this stage.

Taking these steps carefully not only eradicates existing issues but helps reduce risks associated with future infestations.

Effective Steps to Address Black Mold in Deltona FL: From Assessment to Re-Occupancy

Effective mold removal is a multi-step process requiring careful planning and execution. To ensure the complete eradication of mold and prevent its return, specialists follow a structured approach. Below are the key steps involved in professional mold remediation.

1. Initial Assessment and Inspection

  • The type of mold present (e.g., black mold, white mold, etc.).
  • The extent of contamination—whether it’s localized or widespread.
  • The underlying causes, such as leaks or high humidity, that contributed to mold growth.

Specialized tools like moisture meters and infrared cameras may be used to identify hidden moisture sources that encourage mold proliferation.

2. Containment of Affected Areas

  • Plastic sheeting: To seal off walls, doors, and HVAC vents within affected spaces.
  • Negative air pressure systems: These use air filtration devices (AFDs) with HEPA filters to ensure airflow moves inward but not outward from the contained area.

This step ensures other areas remain safe from contamination while work proceeds.

3. Mold Removal Techniques

  1. a) Non-Porous Surfaces: Hard surfaces like metal or glass are thoroughly cleaned using antimicrobial cleaning agents that kill existing mold spores.
  2. b) Porous Materials: Items like drywall, carpets, or ceiling tiles are more challenging since they absorb moisture easily. Often these materials must be cut out and replaced if significant growth has occurred (see additional considerations below for porous materials).
  3. c) HEPA Vacuuming & Surface Cleaning: After large debris is removed, surfaces are vacuumed with HEPA-grade vacuums designed to capture tiny particles as small as 0.3 microns.

4. Address Underlying Moisture Issues

  • Repairing plumbing leaks or roof damage.
  • Improving ventilation in high humidity rooms like bathrooms or kitchens.
  • Installing dehumidifiers in areas prone to dampness.

A proactive approach ensures that spores do not have conditions favorable for regrowth.

5. Post-Cleaning Verification Testing

Test Type Purpose Tools Used
Air Sampling Checks air quality for remaining spores Spore traps
Surface Sampling Verifies cleanliness post-removal Swabs/adhesive tape sampling
Humidity Measurements Ensures optimal indoor humidity levels Hygrometers

These tests ensure the remediation process has been successful before reoccupying treated spaces.

6. Re-Occupancy Guidelines

  • Ensure HVAC systems are functioning normally without circulating contaminants.
  • Keep indoor relative humidity below recommended levels (30%-50%).
  • Use air purifiers if advised by experts during final walkthroughs.

Each step plays an integral role in ensuring both effective remediation and long-term prevention against future infestations.

Effective Mold Remediation: The Role of Containment and Negative Pressure in Mold Inspection Deltona FL

When dealing with mold remediation, establishing containment and using negative pressure are critical steps to prevent the spread of mold spores. Without proper containment protocols, mold spores can travel to unaffected areas, complicating the removal process and posing additional health risks. Below is a detailed guide on why these techniques are essential and how they’re implemented effectively.

Understanding Why Containment Matters in Mold Testing Deltona FL

  • Limits the Spread of Mold Spores: Prevents contamination of other areas within the building.
  • Reduces Health Risks: Protects people in non-affected areas from inhaling airborne spores.
  • Streamlines Cleanup: Confines the problem area, making it easier to clean thoroughly.

Effective Containment Methods Used by a Mold Removal Company Deltona FL

  1. Used for small to moderate infestations (less than 10 square feet).
  2. Typically involves using plastic sheeting to isolate affected areas.
  3. Entry points may include zipper doors or adhesive flaps.
  4. Required for larger-scale infestations (more than 10 square feet).
  5. Involves constructing a critical barrier with floor-to-ceiling plastic sheeting.
  6. Sealing HVAC openings is necessary to prevent cross-contamination through ventilation systems.
  7. Applied for specific tasks such as sanding or demolition within a larger work area.
  8. Often used along with negative pressure systems.

Understanding Negative Pressure Systems

Negative pressure is a key component in effective containment strategies. It involves creating an environment where air flows into the contained area but not out of it, ensuring mold spores do not escape during remediation work.

  • A high-efficiency particulate air (HEPA) filtration device equipped with an exhaust fan is placed inside the containment zone.
  • The fan continually draws air from outside into the contained space while venting filtered air outside the property.
  • This creates a “negative” air environment that prevents contaminated air from leaking out.
Equipment Description
HEPA Air Scrubbers Filters airborne particles as small as 0.3 microns, including mold spores.
Polyethylene Sheeting Used to seal off walls, floors, ceilings, and entrances/exits.
Negative Air Machines Maintains airflow direction while exhausting filtered air outdoors.

Benefits of Using Both Techniques Together

  1. Airborne spore concentration is significantly reduced both inside and outside the affected area.
  2. Adjacent rooms or spaces remain protected from contamination during remediation efforts.
  3. Ensures compliance with industry standards like those set by organizations such as IICRC (Institute of Inspection Cleaning and Restoration Certification).

Practical Tips for Effective Implementation

  • Always inspect barriers regularly during removal processes; repair any tears immediately.
  • Monitor airflow patterns using devices like manometers to confirm that adequate negative pressure levels are maintained (typically at least 5 Pascals difference).
  • Seal all HVAC vents tightly using duct tape and polyethylene sheets before starting remediation work.

By applying these principles effectively, professionals can ensure that mold removal efforts are safe, efficient, and compliant with best practices while minimizing risks associated with airborne contaminants.

Mold in corner Mold in window corner. Close-up. black mold stock pictures, royalty-free photos & images

How to Handle Porous Materials During the Mold Removal Process

Porous materials, such as drywall, carpeting, fabric, and insulation, can be particularly challenging to address during mold removal. These materials are highly susceptible to mold growth due to their ability to absorb moisture and provide ample surface area for spores to thrive. To ensure effective remediation and prevent recurrence, it’s crucial to approach the handling of porous materials with care and expertise.

Identifying Mold-Infested Porous Materials

  • Visible staining or discoloration (often black, green, or white spots).
  • Musty odors emanating from the material.
  • Softened or deteriorated texture due to prolonged exposure to moisture.

It’s essential to inspect all areas where water damage has occurred since mold often grows in hidden or hard-to-access locations.

Determining Whether Porous Materials Can Be Salvaged

  • Replace: Materials like drywall and insulation typically cannot be salvaged if they are deeply contaminated with mold.
  • Clean: Lightly affected items such as some fabrics or furniture may be cleaned using appropriate techniques (e.g., antimicrobial treatments).
  • Assess Extent of Damage: If there is extensive structural integrity loss, replacement is often the safest course of action.

Steps for Removing Mold from Porous Materials

  1. Isolate the Area
    Use containment measures like plastic sheeting and establish negative pressure zones using air filtration devices. This prevents the spread of spores during cleaning or removal.
  2. Dry Out Materials First
    Ensure all surfaces are dry before attempting any remediation efforts. Dehumidifiers and air movers can help speed up this process if needed.
  3. Use an Appropriate Cleaning Agent
    Apply an antimicrobial cleaner designed for mold remediation on lightly affected areas. Ensure compatibility with the specific material being treated.
  4. Employ HEPA Vacuuming
    After cleaning surfaces with a solution, use a HEPA vacuum cleaner to remove any remaining mold particles effectively.
  5. Monitor Progress
    Reassess cleaned items for signs of residual contamination after treatment is complete.
Material Type Salvageable? Notes
Drywall No Replace if contaminated; cleaning methods typically ineffective
Carpeting Sometimes Depends on extent of damage; professional steam cleaning may work
Insulation No Replace entirely; high absorbency makes effective cleaning unfeasible
Upholstery/Fabrics Sometimes Clean with antimicrobial agents; test small areas first

Proper Disposal of Unsalvageable Items

  1. Seal them tightly in heavy-duty plastic bags before disposal.
  2. Label bags as contaminated waste as per local regulations.
  3. Dispose of these items properly in accordance with municipal waste management guidelines.

Preventing Future Mold Issues on Porous Surfaces

  • Control indoor humidity levels (ideally below 50%) using dehumidifiers.
  • Fix leaks promptly and ensure proper ventilation in moisture-prone areas like bathrooms.
  • Consider replacing vulnerable porous surfaces with nonporous alternatives when possible (e.g., tile instead of carpet).

Taking a systematic approach to managing porous materials during the mold remediation process not only ensures thorough removal but also helps minimize health risks associated with exposure while preventing recurrence in your space over time.

What HEPA Vacuuming and Detailed Surface Cleaning Entail in Mold Removal

Effective mold remediation involves several critical steps to ensure that the mold problem is thoroughly addressed and does not return. Among these steps, HEPA vacuuming and detailed surface cleaning are crucial components to eliminate mold, mold spores, and associated debris from affected areas. Below is an explanation of what these processes entail, why they matter, and how they contribute to the overall success of mold removal efforts.

What is HEPA Vacuuming?

High-Efficiency Particulate Air (HEPA) vacuuming is a specialized cleaning method used during mold remediation to remove fine particles, including microscopic mold spores. Unlike conventional vacuums, HEPA vacuums are equipped with filters capable of trapping 99.97% of airborne particles as small as 0.3 microns.

Benefits of HEPA Vacuuming:
Prevents Mold Spread: By capturing tiny spores that may become airborne during cleaning, it minimizes cross-contamination to other areas of the property.
Removes Residual Contaminants: Even after visible mold has been removed, spores and dust may linger on surfaces or within porous materials. HEPA vacuuming addresses this issue effectively.
Improves Air Quality: Trapped particulates won’t re-enter the air, thus improving indoor air quality for occupants post-remediation.

Common Surfaces for HEPA Vacuuming:
– Hard surfaces such as floors, walls, ceilings
– Carpets or rugs (if salvageable)
– Furniture or upholstered items in some cases (depending on contamination level)

Detailed Surface Cleaning After Mold Removal

Once loose debris and spores are removed via HEPA vacuuming, detailed surface cleaning is performed to sanitize all affected areas thoroughly. This step complements prior efforts by eradicating stubborn stains or residual organic material that can serve as a breeding ground for future growth.

  1. Cleaning Agents: Biocides or antifungal solutions are often applied during this stage to kill remaining microorganisms and create an inhospitable environment for regrowth.
  2. Use damp wiping techniques with microfiber cloths saturated in an antimicrobial cleaner.
  3. Ensure proper drying afterward to prevent moisture retention.
  4. If certain porous items like drywall or insulation show visible damage or contamination beyond repairable levels, they may need complete removal rather than surface cleaning.
  5. Professional-grade brushes and tools may be used for intricate spaces like HVAC grilles, corners where dust collects easily.

Comparing Conventional vs Professional Techniques

Feature Conventional Cleaning Professional Mold Cleaning (HEPA + Detailed)
Particle Removal Limited Thorough (traps particles >0.3 microns)
Cross-Contamination Risk High Minimal
Use of Antimicrobials Rarely Common
Efficacy Against Spores Moderate High

Why These Steps Matter

HEPA vacuuming followed by detailed surface cleaning ensures no trace of active contamination remains while addressing invisible threats like spores lingering on surfaces or within indoor air systems. This two-pronged approach not only restores cleanliness but also helps break the cycle of reinfestation.

Addressing these aspects properly requires professional expertise due to the specialized equipment involved and precise handling necessary when dealing with hazardous contaminants like mold spores responsibly.

Early Signs of Mold Exposure and Why You Should Address Them Quickly

Mold exposure can lead to significant health risks and property damage if not identified and addressed promptly. Recognizing the early signs of mold exposure is critical to protecting your living environment and ensuring the safety of those in it. Below, we explore the key indicators of mold exposure, its potential effects, and why swift action is essential.

Common Symptoms of Mold Exposure

  • Frequent coughing or sneezing
  • Nasal congestion or runny nose
  • Shortness of breath or wheezing
  • Redness, itching, or watery eyes
  • Rashes, hives, or other forms of irritation
  • Persistent headaches that worsen in certain areas of the home
  • Chronic tiredness or a general feeling of malaise

Many individuals dismiss these symptoms as seasonal allergies or minor illnesses. However, if these symptoms persist and worsen indoors—especially in specific rooms—it could be a sign of mold infestation.

Visual Signs That Indicate Mold Contamination

  1. Discoloration on Walls or Ceilings: Greenish-black spots or stains may appear on drywall, tiles, or grout.
  2. Musty Odors: A persistent damp smell often accompanies hidden molds.
  3. Warping Materials: Wood, fabric, wallpaper, or drywall showing signs of warping might be retaining moisture—a condition conducive to mold growth.
  4. Visible Mold Growth: Clusters that look powdery, velvety, or slimy appearing in damp areas like basements and bathrooms.

If these signs are present alongside health symptoms mentioned earlier, professional inspection should be considered immediately.

Health Risks Associated with Prolonged Exposure

Risk Group Potential Effects
Children & Infants Developmental issues; increased asthma risk
Elderly Individuals Exacerbation of pre-existing respiratory issues
Immunocompromised Higher risk for infections from toxic molds
General Population Chronic sinusitis; long-term respiratory damage

Toxic molds such as Stachybotrys chartarum (commonly known as black mold) can release mycotoxins that further aggravate these risks.

Why Prompt Action Is Crucial

  1. Prevents Health Deterioration: Prolonged exposure increases sensitivity levels and worsens conditions like asthma.
  2. Limits Property Damage: Mold spreads rapidly under favorable conditions (moisture + warmth), leading to costly repairs if left unchecked.
  3. Avoids Costlier Remediation Efforts: Treating minor infestations is significantly less expensive than addressing widespread contamination.
  4. Protects Indoor Air Quality: Active cleanup minimizes airborne particle circulation caused by disrupted spores.

Steps You Should Take Upon Noticing Early Indicators

  1. Inspect moisture-prone areas such as bathrooms, kitchens, basements.
  2. Use a DIY test kit for an initial assessment (though professional testing is recommended for accuracy).
  3. Improve ventilation—use exhaust fans regularly in high-humidity areas.
  4. Consult certified mold remediation experts if contamination is confirmed.

Proactive measures safeguard both your health and property against further damage caused by unchecked growths over time.

By staying vigilant about early warning indicators like unexplained physical symptoms paired with visual clues around your space…

Why Mold Grows in Bathrooms and How to Permanently Stop Its Return

Bathrooms are one of the most common areas in a home where mold thrives. The combination of moisture, warmth, and limited ventilation creates an ideal environment for mold growth. If left unchecked, bathroom mold can damage surfaces, compromise air quality, and pose health risks. Understanding why mold grows in bathrooms and implementing effective preventative measures can help you eliminate this persistent issue for good.

Why Mold Thrives in Bathrooms

  1. High Humidity Levels
    Bathrooms typically have elevated humidity levels due to frequent use of hot water for showers and baths. This moisture-rich environment enables mold spores to grow rapidly on walls, ceilings, grout lines, and other surfaces.
  2. Poor Ventilation
    Without proper ventilation, moisture from bathing or showering cannot dissipate effectively. Lack of airflow encourages water vapor to condense on surfaces like mirrors, tiles, or painted walls.
  3. Porous Materials
    Many bathroom materials such as grout, drywall, or wooden cabinets are porous and absorb moisture easily. This trapped moisture becomes a breeding ground for mold.
  4. Neglected Maintenance
    Leaks from pipes or fixtures that go unnoticed create damp conditions that support mold growth over time.

Steps to Permanently Stop Mold Growth in Bathrooms

  1. Install an exhaust fan rated for the size of your bathroom; run it during showers and for at least 30 minutes afterward.
  2. Alternatively, open windows or doors periodically to encourage airflow and reduce trapped humidity.
  3. Keep indoor humidity levels below 50%. Use a dehumidifier if necessary.
  4. Wipe down wet surfaces such as shower walls or mirrors after use with a squeegee or towel.
  5. Fix Leaks Promptly
    Identify leaks under sinks or around toilet bases early on and repair them immediately to prevent water buildup behind fixtures.
  6. Seal Grout Lines & Other Porous Surfaces
    Apply a waterproof sealant to grout lines between tiles annually to prevent moisture absorption.
  7. Use Mold-Resistant Materials During Renovations In case of bathroom remodeling projects:
Area Recommended Material
Walls Mold-resistant drywall (green board)
Paint Anti-microbial/mildew-resistant paint
Shower Curtains Mildew-resistant fabric curtains
Flooring Non-porous tiles like ceramic or porcelain
  1. Clean your bathroom weekly with products that contain antimicrobial ingredients.
  2. Pay special attention to high-risk areas like grout lines, caulking around tubs/showers, and under sinks.
  3. Replace Damaged Caulking/Grout If caulking shows signs of mildew stains that don’t come off despite cleaning efforts:
    • Remove old caulk carefully using a scraper.
    • Reapply new mildew-resistant caulk near tubs or sinks as part of upkeep.

Natural Remedies vs Chemical Solutions

  • Mix equal parts white vinegar and water; apply it onto affected areas using a spray bottle.
  • Combine baking soda with water until it forms a paste; scrub the mixture into grout lines gently before rinsing thoroughly with warm water.

Both solutions work well when combined with regular cleaning habits but should not replace professional remediation if widespread infestations exist.

By consistently monitoring your bathroom’s conditions—addressing leaks swiftly while maintaining proper ventilation—you can significantly reduce the likelihood of recurring mold problems over time.

Tags:

Mold Removal Deltona FL: Understanding the Difference Between Mold Abatement and Mold Remediation

Man found mold on wall , in your residential building after renovation Man found mold on wall , in your residential building after renovation. a hand in a bathrobe and a protective glove holds a spray gun with an anti-mold agent. big mold on the wall black mold stock pictures, royalty-free photos & images

When dealing with mold issues in homes or businesses, it is essential to understand the differences between mold abatement and mold remediation. These terms are often used interchangeably, but they represent distinct processes that address mold problems from different angles. Knowing which approach is appropriate for your situation can help you take informed action and ensure a safe environment.

Understanding Mold Remediation Deltona FL: What You Need to Know

Mold abatement refers to the process of reducing, controlling, or removing mold growth in a specific area. It focuses on addressing the immediate presence of mold to prevent its spread. This process typically involves:
– Identifying areas where mold is visibly growing or suspected.
– Cleaning surfaces to remove visible mold growth.
– Using specialized equipment, such as air scrubbers or HEPA vacuums, to reduce airborne mold spores.

Key characteristics of mold abatement:
– Targets existing contamination and visible mold colonies.
– Helps minimize exposure risks during the removal process.
– Does not always address underlying causes of moisture problems.

Mold abatement serves as a short-term solution designed to manage the present issue quickly but does not necessarily eliminate conditions that may lead to future growth.

Understanding Black Mold Remediation in Deltona FL

Mold remediation, on the other hand, takes a more comprehensive approach by addressing both visible and hidden mold infestations as well as resolving conditions that contribute to their development. Remediation includes inspection, removal, containment, and prevention strategies aimed at eliminating the root cause of the problem.

Essential steps in mold remediation include:
1. Inspection: Locating both visible and concealed sources of contamination through professional inspection tools such as infrared cameras or moisture meters. 2. Containment: Isolating affected areas with barriers like plastic sheeting or negative air chambers to prevent cross-contamination. 3. Removal: Eliminating all contaminated materials (e.g., drywall, insulation) that cannot be adequately cleaned. 4. Cleaning: Treating non-porous surfaces with antimicrobial solutions and using HEPA-filtered equipment for thorough cleaning. 5. Drying: Ensuring all affected spaces are properly dried using industrial dehumidifiers or air movers. 6. Restoration: Replacing damaged building materials while ensuring effective long-term moisture control solutions are implemented.

Key characteristics of remediation include: – Focuses on long-term solutions rather than temporary fixes. – Involves intensive cleaning methods alongside preventive measures. – Addresses underlying issues like poor ventilation or water leaks.

Comprehensive Mold Inspection Deltona FL Comparison Table

Aspect Mold Abatement Mold Remediation
Scope Immediate reduction/removal Comprehensive resolution
Focus Visible contamination Long-term prevention & root cause
Process Complexity Simpler techniques Multi-step process
Sustainability May allow regrowth if sources persist Minimizes chances of recurrence

The Importance of Mold Testing Deltona FL and Why Understanding the Difference Matters

Selecting between abatement and remediation depends on factors such as severity, type of building use (residential vs commercial), and whether conditions promoting fungal growth have been addressed fully. For minor outbreaks caused by temporary humidity changes (e.g., post-flooding cleanup), abatement may suffice when handled promptly following established safety protocols like proper PPE usage and disposal practices.

However prolonged exposure cases necessitate comprehensive remediation ensuring occupants’ health remains uncompromised long term preventing structural compromise risks/errors via overlooking hidden traces elsewhere systemically intact critical affecting vulnerable populations nearby-sensitive immune systems young children elderly alike .

Understanding these distinctions allows property owners/managers alike make budget-conscious informed timely decisions protecting investments ensuring harmony return-airflow ecosystem indoors healthy living/business thriving safeguarding reputation clientele peace mind

Essential Steps to Hire the Best Mold Removal Company Deltona FL

Mold abatement is the process of reducing or eliminating mold in a building to ensure it does not pose health risks or further damage to the property. This process is essential for maintaining a safe and healthy environment, especially in homes or workplaces where mold can grow rapidly under the right conditions. Below, we outline the key processes involved in effective mold abatement and highlight the steps necessary to achieve long-term results.

Understanding Mold Abatement vs. Remediation

Before diving into the steps, it’s important to distinguish mold abatement from remediation. While remediation focuses on removing and treating existing mold growth, abatement emphasizes addressing underlying causes and implementing measures to prevent future infestations. Both processes often work hand-in-hand for comprehensive results.

Key Processes in Mold Abatement

  1. Conduct a thorough inspection of the property to identify areas affected by mold.
  2. Use tools such as moisture meters, thermal imaging cameras, or hygrometers to detect hidden moisture sources.
  3. Assess potential health risks based on the type of mold present (e.g., allergenic vs. toxic molds).
  4. Identifying Moisture Sources
    Mold thrives in areas with high humidity or water damage. Common sources include:

    • Leaking pipes or roofs
    • Condensation from HVAC systems
    • Poor ventilation in bathrooms or basements

Locating and addressing these sources is critical for successful abatement.

  1. Containment of Affected Areas
    To prevent spores from spreading during removal:

    • Isolate contaminated areas using plastic sheeting and negative air pressure systems.
    • Turn off HVAC systems in the affected spaces to limit airborne movement of spores.

Essential Steps for Effective Mold Abatement

Step Description Tools/Materials Required
1 Moisture Control: Fix leaks or improve drainage around the property before any removal efforts begin. Sealants, plumbing repair tools
2 Mold Removal: Physically remove porous materials like drywall when heavily contaminated; non-porous surfaces can be cleaned using appropriate solutions like hydrogen peroxide or bleach (if safe). PPE gear (respirators, gloves), cleaning agents
3 Drying & Dehumidification: Use dehumidifiers or fans to dry out any residual moisture after cleaning affected areas thoroughly. Dehumidifiers, industrial fans
4 HEPA Vacuuming: Vacuum surfaces with HEPA filters to capture microscopic particles left behind after removal efforts are complete. HEPA vacuum cleaner
5 Preventive Measures: Apply anti-microbial coatings on vulnerable surfaces to discourage future growth of spores. Improve ventilation by installing exhaust fans where necessary. Anti-microbial sprays/coatings

Tips for Long-Term Prevention

  • Maintain indoor humidity levels between 30%–50%.
  • Use a hygrometer to regularly monitor relative indoor humidity.
  • Ensure proper drainage around your foundation by cleaning gutters and directing downspouts away from your property.
  • Regularly inspect plumbing fixtures, roofs, windowsills, and other areas prone to leaks.
  • Ventilate high-moisture spaces like kitchens, bathrooms, laundry rooms with exhaust fans that vent outward.

By integrating these steps into routine maintenance practices, you can reduce the likelihood of future mold infestations while protecting both structural integrity and occupant health.

Effective mold abatement requires careful planning and execution at every stage—from identifying problem areas to implementing preventive measures post-cleanup. With attention paid not only to immediate removal but also long-term prevention strategies, property owners can ensure their environments remain free from potentially harmful spores over time.

Woman washes white walls in an apartment in gloves. She cleans wall of black mold. damp room. There are cleaning products nearby. Concept of cleaning apartment Woman washes white walls in an apartment in gloves. She cleans wall of black mold. damp room. There are cleaning products nearby. Concept of cleaning apartment. black mold stock pictures, royalty-free photos & images

Steps Involved in Safe and Thorough Mold Remediation

Mold remediation is a critical process to ensure the health and safety of individuals in buildings affected by mold growth. When performed correctly, it not only removes mold but also addresses the root causes to prevent its recurrence. Below is a detailed guide on the steps involved in safe and thorough mold remediation.

Step 1: Conducting a Mold Inspection and Assessment

  • Visual inspection: Checking for visible signs of mold on walls, floors, ceilings, and other surfaces.
  • Moisture assessment: Using moisture meters or thermal imaging tools to identify areas with high humidity or water leaks.
  • Air sampling: Testing indoor air quality to detect airborne mold spores.

By identifying the scope of contamination, property owners can make informed decisions about the remediation process.

Step 2: Containing Affected Areas

  • Installing plastic sheeting with tape or zip walls to seal off the contaminated area.
  • Creating negative air pressure using HEPA-filtered air scrubbers.
  • Restricting access to unaffected areas.

Proper containment ensures that mold does not spread during removal activities.

Step 3: Removing Mold-Damaged Materials

  • Double-bagging contaminated materials in heavy-duty plastic bags for disposal.
  • Cleaning salvageable nonporous items like glass or metal using appropriate cleaning agents.
Material Type Recommended Treatment
Porous (e.g., drywall) Remove & dispose
Semi-Porous (e.g., wood) Clean & sand
Nonporous (e.g., metal) Clean thoroughly

Step 4: Cleaning Surfaces with Proper Tools

  • Vacuuming with HEPA vacuums to remove loose spores.
  • Wiping down surfaces using antimicrobial solutions or detergent-based cleaners.
  • Scrubbing hard-to-reach areas where spores may linger.

Ensure all equipment used for cleaning is disinfected after use.

Step 5: Drying and Dehumidifying

  1. Using industrial-grade dehumidifiers to reduce moisture levels quickly.
  2. Running fans or blowers strategically for airflow improvement.
  3. Monitoring humidity levels until they stabilize below 60%.

Step 6: Identifying Root Causes of Moisture Problems

  • Leaking pipes or roofs
  • Poor ventilation in bathrooms or basements
  • Cracks in foundations allowing moisture entry

Repair any structural issues found during this stage.

Step 7: Final Mold Testing (Optional)

After completing remediation efforts, post-remediation testing can confirm success by ensuring spore levels are within acceptable ranges. While not always mandatory, this step provides peace of mind for building occupants.

By following these steps meticulously, professionals can ensure safe removal while mitigating future risks associated with mold growth.

Mold Testing and Remediation: A Comprehensive Guide to Removing Mold Safely

Mold growth can be a serious problem for homeowners and businesses alike, leading to structural damage and health risks if left untreated. Effective mold testing and remediation are critical to ensuring the safety of your indoor environment. Below is a comprehensive guide to help you understand the steps involved in identifying and safely eliminating mold.

Why Mold Testing Matters

Mold testing is an essential first step in addressing mold-related issues. It helps determine:
– The type of mold present (e.g., black mold, white mold).
– The extent of the contamination.
– Airborne spore levels that may affect air quality.

Testing can also help identify hidden molds that are not visible to the naked eye, such as those behind walls or under carpets.

Types of Mold Tests

There are several methods used for mold testing:
1. Air Sampling: Measures the concentration of airborne spores and compares it to outdoor levels.
2. Surface Sampling: Collects samples from visible surfaces for laboratory analysis.
3. Bulk Sampling: Examines pieces of material (e.g., drywall or carpet) suspected of being contaminated with mold.

It’s recommended to hire professional inspectors for accurate results, as they have specialized tools like moisture meters and thermal imaging cameras.

Understanding Mold Remediation

Once testing confirms the presence of harmful mold, remediation must begin promptly to mitigate further damage and health risks.

Key Steps in Mold Remediation
  1. Seal off affected areas with plastic sheeting to prevent cross-contamination during cleanup.
  2. Use negative air pressure machines equipped with HEPA filters to trap spores.
  3. Wear gloves, goggles, N95 masks, or respirators to minimize exposure.
  4. Ensure proper ventilation during remediation efforts.
  5. Dispose of porous materials like drywall, insulation, or carpeting that cannot be effectively cleaned.
  6. Clean non-porous surfaces using solutions such as diluted bleach or commercial antifungal products.
  7. Eliminate excess moisture using industrial-grade dehumidifiers and air movers.
  8. Monitor humidity levels frequently; aim for a relative humidity below 50%.
  9. Use HEPA vacuums on floors, walls, furniture, and other surfaces.
  10. Apply antimicrobial treatments to prevent future growth.
  11. Final Testing: Conduct post-remediation verification tests to ensure mold levels are back within a safe range.
Step Tools & Equipment Needed Purpose
Containment Plastic sheeting, HEPA filters Block further spore spread
PPE Utilization Gloves, N95 mask Protect from direct exposure
Material Removal Utility knife, trash bags Remove damaged components
Drying/Dehumidifying Dehumidifier Prevent recurrence by eliminating moisture
Cleaning/Disinfection HEPA vacuum Remove residual spores

Prevention After Remediation

Once remediation is complete, take proactive measures to prevent future occurrences:
– Address any water leaks or sources of excess moisture immediately. – Ensure proper ventilation in bathrooms and kitchens by using exhaust fans. – Monitor humidity levels consistently with a hygrometer. – Schedule periodic inspections if your property has a history of water damage or flooding.

By following these steps diligently and enlisting professional assistance when necessary, you can ensure effective mold removal while safeguarding your property against future contamination risks.

Black Mold Removal: A Simple Guide to Protecting Your Home or Business

Black mold, also known as Stachybotrys chartarum, is a type of mold that can pose serious health risks and cause structural damage to your home or business if left untreated. Understanding how to identify, remove, and prevent black mold is crucial for maintaining a safe and healthy environment. This guide will provide you with actionable steps to tackle black mold effectively.

Identifying Black Mold

  • Appearance: Black mold typically appears as dark green or black spots on walls, ceilings, or other surfaces.
  • Odor: A persistent musty smell often indicates hidden mold growth.
  • Health Symptoms: Black mold exposure can cause allergic reactions such as sneezing, coughing, skin irritation, and respiratory issues.

If you’re uncertain whether the mold in your property is toxic black mold, consider professional testing services.

Tools and Materials Needed for Black Mold Removal

Tools Materials
Protective gloves Mold removal cleaner
Safety goggles Baking soda
N95 respirator mask White vinegar
Scrub brushes Detergent
Buckets Plastic sheeting
Microfiber cloths Sealant (optional)

Using proper safety gear prevents exposure to harmful spores during removal.

Step-by-Step Process for Removing Black Mold

  1. Isolate the Area
    Seal off the affected area using plastic sheeting to prevent spores from spreading throughout the building. Turn off HVAC systems during the process.
  2. Wear Protective Gear
    Always wear gloves, safety goggles, and an N95 respirator mask when dealing with black mold.
  3. Create a Cleaning Solution
    Use one of the following mixtures:
  4. Combine one cup of white vinegar with two cups of water.
  5. Mix one teaspoon of baking soda with two cups of water. Alternatively, use commercial-grade cleaners specifically designed for mold removal.
  6. Scrub the Affected Surfaces
    Apply the cleaning solution generously to contaminated areas using a microfiber cloth or scrub brush. For porous materials like drywall that cannot be adequately cleaned, consider removing and replacing them entirely.
  7. Disinfect the Area
    After scrubbing away visible mold growth, disinfect the surface by wiping it down with undiluted white vinegar or another antimicrobial agent.
  8. Dry Thoroughly
    Ensure that all surfaces are completely dry after cleaning by using fans or dehumidifiers. Moisture contributes to future growth if not addressed properly.
  9. Dispose Properly
    Place any contaminated materials (e.g., rags or removed drywall) in sealed plastic bags before disposing of them according to local regulations.

Tips for Preventing Future Black Mold Growth

  • Maintain indoor humidity levels below 50% using dehumidifiers.
  • Fix leaks promptly in plumbing systems, roofs, and windows.
  • Improve ventilation in moisture-prone areas such as bathrooms and basements.
  • Regularly inspect your property for signs of water damage or dampness.
  • Use anti-mold paints on walls in high-humidity areas when renovating spaces prone to moisture build-up.

Taking these preventative measures significantly reduces the risk of recurring issues with black mold on your property.

Understanding how to deal with black mold ensures both safety and peace of mind when safeguarding your living or work environment against potential hazards it poses. Proper preparation combined with diligent attention will protect your property from costly long-term damages while preserving occupant health effectively over time.


Tags:

Exploring Effective Solutions for Black Mold Deltona FL: Removal vs. Remediation

Black mold and mildew spots on the ceiling or wall due to poor air ventilation and high humidity. Harm to health. Black mold and mildew spots on the ceiling or wall due to poor air ventilation and high humidity. Harm black mold stock pictures, royalty-free photos & images

When it comes to addressing a mold problem in your home or property, it’s important to understand the distinction between mold removal and mold remediation. While these terms are sometimes used interchangeably, they refer to different processes that serve distinct purposes.

What is Mold Removal?

Mold removal refers to the process of physically eliminating mold spores and colonies from contaminated surfaces. This is often a temporary solution, targeting only the visible mold growth without addressing underlying causes. Because mold spores are naturally present in every environment, complete removal of all traces of mold is virtually impossible.

Key characteristics of mold removal include:
Focus on visible mold: Removes surface-level mold growth from affected areas.
Short-term solution: Does not always tackle the root cause of the infestation. – May involve basic cleaning methods: Such as scrubbing with detergent or applying biocides.

While helpful for improving aesthetics and reducing immediate health risks, mold removal alone may not prevent future outbreaks if conditions remain favorable for mold growth.

What is Mold Remediation?

In contrast, mold remediation is a comprehensive approach designed to manage and control mold issues more effectively. It focuses on identifying and addressing the root causes that allow mold to thrive—such as excess moisture or poor ventilation—while also removing existing contamination.

Steps involved in a typical remediation process:
1. Inspection and Assessment: Professionals identify affected areas and measure contamination levels.
2. Containment: Barriers such as plastic sheeting or negative air pressure systems are set up to prevent the spread of spores during cleanup.
3. Removal of Contaminated Materials: Heavily infested materials like drywall or carpeting may need to be removed and disposed of properly.
4. Surface Treatment and Cleaning: Specialized tools like HEPA vacuums, antimicrobial solutions, or dry ice blasting are used for thorough cleaning. 5. Addressing Moisture Issues: Repairs to leaks, improved ventilation systems, or dehumidifiers may be necessary to eliminate environmental conditions conducive to future growth.

Key Differences Between Mold Removal and Remediation

Aspect Mold Removal Mold Remediation
Objective Eliminate visible mold growth Address root causes & manage recurrence
Scope Limited Comprehensive
Longevity Temporary solution Long-term prevention
Techniques Basic cleaning methods Advanced tools & containment

Which Approach Do You Need?

  • Opt for simple removal when dealing with small surface-level outbreaks in low-risk areas (e.g., bathtub grout).
  • For extensive infestations or recurring problems caused by structural issues, professional remediation ensures a more permanent resolution.

Understanding these differences empowers homeowners to make informed decisions when tackling fungal contamination in their spaces effectively. By selecting the appropriate course of action—whether it’s basic cleanup or comprehensive remediation—you can protect both your property value and personal well-being efficiently over time.

Comprehensive Guide to Mold Removal Deltona FL and Its Importance for Your Home

Mold removal is a critical process to maintain a healthy living environment in your home. When left unchecked, mold can lead to various structural and health-related issues, making it essential for homeowners to understand its risks and the importance of proper removal.

Understanding Mold Inspection Deltona FL and Removal Methods

Mold removal refers to the process of identifying, cleaning, and eliminating mold colonies from surfaces within your home. Unlike mold remediation—which focuses on addressing the root cause of mold growth—mold removal primarily deals with physically eliminating visible mold.

  • Bathrooms
  • Kitchens
  • Basements
  • Attics
  • HVAC systems

Addressing visible mold is essential because it prevents further contamination, reduces allergens in the air, and minimizes the risks associated with long-term exposure.

The Importance of Mold Testing Deltona FL for a Healthy Home

1. Protecting Your Health

  • Nasal congestion
  • Coughing or wheezing
  • Skin irritation or rashes
  • Eye redness or itchiness

For individuals with weakened immune systems, certain types of molds (e.g., black mold) can pose severe risks.

2. Preventing Structural Damage

  • Mold weakens the integrity of structures.
  • It leads to discoloration and unsightly stains.
  • Repairs become more expensive as damage worsens.

3. Improving Indoor Air Quality

Mold releases spores into the air that can spread throughout your home via ventilation systems. These spores reduce indoor air quality by introducing allergens and irritants that circulate in living spaces.

4. Enhancing Property Value

A property infested with mold can see a drop in value due to buyer concerns about safety and repair costs. Removing existing mold ensures that your home remains marketable and appealing should you decide to sell.

Comprehensive Guide from a Mold Removal Company in Deltona FL

Step Description
Inspection & Assessment Professionals assess areas affected by moisture or visible signs of contamination.
Containment To prevent further spread, barriers like plastic sheeting are set up around affected areas.
Removal Physical elimination of visible molds using specialized tools or cleaning agents.
Cleaning & Sanitizing Surfaces are cleaned thoroughly using antimicrobial solutions to remove residues.
Drying Affected areas are dried completely using dehumidifiers or fans.

DIY vs Professional Mold Removal

While small patches of surface-level mold may be manageable with DIY methods like vinegar or baking soda solutions, larger infestations require professional intervention due to their complexity and potential hazards. Professionals have access to advanced equipment such as HEPA vacuums and protective gear that ensure thorough removal while safeguarding against exposure risks.

Preventative Measures Post-Mold Removal

  1. Fix sources of leaks (e.g., plumbing issues).
  2. Use dehumidifiers to maintain indoor humidity below 50%.
  3. Ventilate high-moisture areas such as bathrooms during use by installing exhaust fans.
  4. Regularly inspect basements, attics, and crawl spaces for signs of dampness.
  5. Clean HVAC systems periodically to prevent spore accumulation.

Effective mold removal protects both the structural integrity of your home and the well-being of its residents—a vital step toward ensuring a safe living space for years ahead.

Comprehensive Guide to Mold Remediation: Steps and Benefits

Mold remediation is a critical process for maintaining the safety and health of your living environment. When left unchecked, mold growth can cause structural damage to your home and pose serious health risks. This guide will walk you through the steps involved in mold remediation and highlight its key benefits.

Steps in the Mold Remediation Process

  1. A professional mold inspection is conducted to determine the extent of mold contamination.
  2. Technicians assess moisture levels using specialized tools like hygrometers and thermal imaging cameras.
  3. Samples may be taken for laboratory analysis to identify specific types of mold.
  4. Containment measures are implemented to prevent mold spores from spreading during removal.
  5. Physical barriers such as plastic sheeting or negative air pressure systems may be used.
  6. HEPA (High-Efficiency Particulate Air) filters are employed to capture airborne spores during remediation.
  7. Air scrubbers help improve indoor air quality throughout the process.
  8. Affected materials such as drywall, carpeting, or insulation may need full removal if severely damaged.
  9. Non-porous surfaces are cleaned with antimicrobial treatments or scrubbed with brushes and detergent solutions.
  10. Professional-grade equipment ensures thorough cleaning without spreading spores further.
  11. Removed building materials like drywall or insulation are replaced after the contamination is eliminated.
  12. Repainting, sealing surfaces, or applying anti-mold coatings helps protect against future outbreaks.
  13. The root cause of moisture intrusion—such as leaks or high humidity levels—is addressed to prevent recurrence.
  14. Dehumidifiers or HVAC system adjustments might be necessary for ongoing moisture management.

Benefits of Mold Remediation

  • Improved Indoor Air Quality: Eliminating airborne spores reduces allergens and irritants that can exacerbate respiratory conditions like asthma or allergies.
  • Prevention of Structural Damage: Mold can weaken wood, drywall, and other building materials over time; prompt remediation ensures your home remains structurally sound.
  • Health Protection: Addressing mold growth minimizes health risks linked to exposure, including headaches, skin irritation, chronic fatigue, and respiratory issues.
  • Enhanced Property Value: Homes free from visible signs of mold have higher market appeal compared to properties with persistent moisture issues or visible damage from past infestations.
Step Description
Inspection Assessing the extent of contamination through tools and lab samples
Containment Isolating affected areas using barriers
Air Filtration Employing HEPA filters for cleaner indoor air
Mold Removal Cleaning or removing contaminated materials
Repair & Restoration Replacing damaged elements after cleaning
Moisture Control Addressing water sources causing mold outbreaks

Professional Assistance vs DIY Solutions

  • Using advanced equipment like HEPA vacuums and antimicrobial agents unavailable in retail stores.
  • Ensuring complete removal without spreading contaminants further into your home.
  • Offering long-term solutions by addressing underlying causes like leaks or inadequate ventilation.

For effective results that prioritize both safety and long-term prevention strategies, professional assistance is highly recommended when dealing with significant or recurring mold problems.

Mold growing in basement bathroom Black mold grows in the basement. The mold was revealed after a poorly installed bathtub and shower surround were removed. black mold stock pictures, royalty-free photos & images

Choosing the Right Mold Remediation Services for Your Needs

When faced with a mold issue in your home, selecting the right remediation service is critical to resolving the problem effectively. Mold can pose significant risks to both health and property, so partnering with a professional service ensures that the job is done correctly and safely. Here are some factors to consider and steps to help you choose the best mold remediation services for your specific needs.

Key Factors to Consider When Selecting a Mold Remediation Service

  1. Look for companies with extensive experience in mold inspection, removal, and remediation.
  2. Verify if their team consists of certified professionals trained in industry protocols like those set by the Institute of Inspection Cleaning and Restoration Certification (IICRC).
  3. Ensure the company holds proper licenses required by your state or region.
  4. They should also carry liability insurance to cover any potential damages during the process.
  5. Choose a service provider that performs thorough inspections to identify not just visible mold but also hidden growth using tools like moisture meters or infrared cameras.
  6. Request an estimate upfront that clearly outlines costs for inspection, equipment usage, labor, repair work, or additional preventative measures.
  7. Reputable services should use EPA-approved solutions and methods for mold removal while adhering strictly to safety standards.
  8. They must avoid practices like “encapsulation” unless absolutely necessary as it can trap moisture beneath surfaces.

Questions to Ask Potential Mold Remediation Companies

  • Do you have references from previous clients?
  • What certifications do your technicians hold?
  • How do you ensure that all mold is effectively removed without cross-contamination?
  • What preventive steps are included post-remediation?

Comparing Services: A Quick Table Overview

Criteria Company A Company B Company C
Years of Experience 10+ 5 8
IICRC Certified Professionals Yes No Yes
Free Initial Inspection Yes Yes No
Warranty Provided Yes (1 year) No Yes (6 months)

Note: Always weigh these factors alongside reviews from customers or trusted sources.

Red Flags to Avoid

  • Offer generic advice without inspecting your property thoroughly.
  • Use scare tactics or pressure you into immediate decisions.
  • Avoid documentation regarding their process or findings.
  • Lack transparency about pricing or methods used.

Benefits of Choosing Qualified Professionals

  • The source of mold growth will be addressed comprehensively.
  • Health risks associated with exposure will be minimized.
  • Preventative measures will reduce future occurrences.

By taking time to evaluate potential companies carefully, you ensure a safe living environment while protecting your investment in your home.

Essential Signs You Need Mold Remediation Deltona FL Services Immediately

Mold growth is not always immediately visible, but addressing it promptly is critical to maintaining a healthy living environment. Identifying the signs of mold can help you act quickly before the problem escalates. Below are key indicators that your home may require immediate mold removal services.

Visible Mold Growth

  • Green, black, or white spots on walls, ceilings, or floors
  • Fuzzy textures on organic materials such as drywall, wood, or fabrics
  • Discoloration on tiles or grout in bathrooms and kitchens

Even small patches of visible mold could indicate larger infestations hidden behind walls or under flooring.

Musty Odors

  • Basements
  • Bathrooms
  • Kitchens
  • Attics

If you notice this smell consistently and cannot locate its source, it’s time to investigate further with professional assistance.

Water Damage and Leaks

Source of Water Damage Potential Problem Areas
Plumbing leaks Under sinks, behind appliances
Roof leaks Ceilings, attic spaces
Flooding Basements, low-level flooring
Condensation buildup Windowsills, HVAC units

If you’ve experienced any of these problems recently or in the past without proper remediation efforts, there’s a high chance that mold might have developed.

Allergic Reactions and Health Symptoms

  • Sneezing
  • Runny nose
  • Itchy eyes or skin
  • Persistent coughing or wheezing

If multiple household members experience these symptoms when at home but not elsewhere, it may be linked to airborne mold spores inside your living space.

Increase in Humidity Levels

  1. Condensation forming on windows or glass surfaces
  2. Dampness lingering in areas like basements and bathrooms
  3. Difficulty keeping wooden furniture or floors dry

Investing in a hygrometer can help monitor indoor humidity levels; anything above 60% should be addressed immediately.

Peeling Paint and Wallpaper

If paint starts bubbling or wallpaper peels away from walls without any apparent cause (such as age), it could indicate moisture intrusion—an issue often associated with hidden mold colonies underneath.

Addressing these warning signs promptly by consulting trained professionals will prevent further structural damage and potential health risks for your family. Regular inspections and maintenance are also recommended if your home has a history of water damage or resides in a humid climate prone to frequent moisture-related problems.

How to Protect Your Home and Health Through Effective Mold Remediation

Mold can pose serious risks to both your home and health if left untreated. Effective mold remediation is essential not only for maintaining the structural integrity of your property but also for safeguarding the well-being of everyone in the household. Here, we explore actionable steps and precautions to protect your home and health through effective mold remediation.

Understanding the Importance of Mold Remediation

Mold thrives in damp, poorly ventilated areas, feeding on organic materials such as wood, drywall, or fabric. Beyond causing damage to these materials, mold releases spores that can trigger health problems, particularly respiratory issues like asthma and allergies. Taking a proactive approach to mold remediation helps:
– Prevent structural deterioration of your home.
– Eliminate potential health hazards caused by mold exposure.
– Maintain indoor air quality for a healthier living environment.

Steps to Effectively Protect Your Home from Mold

  1. Invest in dehumidifiers to maintain indoor humidity levels below 60%.
  2. Regularly check for water leaks around pipes, windows, or roofs and repair them immediately.
  3. Ensure that bathrooms, kitchens, and laundry areas have proper ventilation.
  4. Basements, attics, and crawlspaces are particularly susceptible to mold growth due to limited airflow and high moisture levels. Conduct regular inspections in these spaces.
  5. Use exhaust fans in high-humidity areas like kitchens and bathrooms.
  6. Open windows whenever possible to encourage airflow.
  7. Dry any wet materials within 24-48 hours after flooding or water intrusion.
  8. Remove soaked carpets or upholstery if they cannot be dried promptly.
  9. Use Mold-Resistant Materials (For Renovations)
  10. Opt for mold-resistant drywall or paint in damp-prone areas such as basements or bathrooms.
  11. Seal porous surfaces like wood with appropriate treatments.

Protecting Your Health During Mold Cleanup

  • Use gloves made from natural rubber or neoprene.
  • Wear goggles without ventilation holes to prevent exposure to spores.
  • Don an N95 respirator mask for protection against inhaling particles.
  • Isolate the Affected Area: Close doors or use plastic sheeting to contain spores while cleaning up the moldy space.
  • Utilize Safe Cleaning Solutions: Use a mix of detergent with water for washable surfaces or consider specialized commercial products designed for non-toxic mold removal.

When Professional Help is Necessary

Signs You Need Professional Mold Remediation Explanation
Persistent musty odor Indicates hidden growth that might not be visible without expert assessment
Large-scale spread (>10 square feet) Requires specialized tools and solutions
Health symptoms worsen If household members experience persistent allergies or respiratory issues
Structural damage Visible damage such as rotting walls suggests advanced infestation

Hiring certified professionals ensures thorough removal while reducing risks associated with improper handling of toxic molds like Stachybotrys chartarum (black mold).

By addressing both prevention strategies and effective remediation practices early on, you can uphold a safe and healthy environment within your home while preventing costly damages over time.


Tags:

How to Identify Black Mold in Your Home in Deltona FL

Moldy Corner Mold in a corner beside a window black mold stock pictures, royalty-free photos & images

Black mold, also known as Stachybotrys chartarum, is one of the most concerning types of mold due to its potential health risks. Identifying black mold early is crucial to prevent damage to your home and protect your health. Below are some common warning signs that indicate the possible presence of black mold and tips on how to identify it effectively.

Common Warning Signs of Black Mold

  1. A persistent, unpleasant, and earthy smell is often a key indicator of black mold growth.
  2. These odors are usually more noticeable in areas with poor ventilation, such as basements or bathrooms.
  3. Black mold appears as dark greenish-black or grayish-black patches on surfaces like walls, ceilings, or around windows.
  4. It thrives in damp conditions and often grows on porous materials like drywall, wood, or carpet.
  5. Symptoms such as sneezing, coughing, skin irritation, or watery eyes may worsen when spending time indoors.
  6. These symptoms may persist even after allergy medications if black mold is present.
  7. Areas with water stains, discoloration, or bubbling paint could be hiding black mold behind walls or under flooring.
  8. Mold often grows within 24-48 hours after water damage occurs.
  9. High indoor humidity levels (above 60%) create an ideal environment for black mold growth.
  10. Condensation on windows or walls can be another indicator.

How to Spot Black Mold vs Other Types

Feature Black Mold Characteristics Other Molds Characteristics
Color Dark green/black White/gray/yellow hues
Texture Slimy appearance when wet Powdery/dry texture
Smell Strong musty odor May have no odor
Growth Environment Damp areas: bathrooms/basements/leaky pipes Can grow in dry environments

If you’re unsure whether you’re dealing with black mold specifically, it’s advisable to seek professional inspection services for a definitive identification.

Tools for Identifying Black Mold

  • Flashlight:Inspect dark corners and cracks where lighting may not reach easily.
  • Moisture Meter:Measures moisture levels in walls and ceilings to detect water intrusion.
  • DIY Mold Testing Kits:Available at hardware stores to test and identify specific types of molds.
  • Professional Inspection:Certified technicians use advanced equipment like infrared cameras for precise detection.

Areas Prone to Black Mold Growth

  1. Bathrooms – Especially around bathtubs, showers, sinks, and toilets.
  2. Kitchens – Under sinks or behind appliances like refrigerators.
  3. Basements – Particularly near sump pumps or in areas with previous flooding.
  4. HVAC Systems – In ductwork where condensation accumulates over time.
  5. Windowsills – Where condensation forms from temperature changes.

Regularly inspecting these high-risk areas can help you catch signs early before they escalate into larger issues.

Detecting black mold promptly is essential for both property preservation and maintaining a healthy living environment. If any signs listed above sound familiar within your home setting, consider further investigation without delay.

5 Early Warning Signs You Need Mold Removal Deltona FL Immediately

Toxic black mold (Stachybotrys chartarum) can cause serious health issues and structural damage to your home if left untreated. Identifying the early warning signs of black mold is essential for preventing further complications and ensuring the safety of your household. Below are five critical indicators that may signal the presence of toxic black mold in your home.

Signs You Need a Mold Inspection Deltona FL: Persistent Musty Odor

A strong, persistent musty smell is often one of the first signs of black mold growth. This odor typically originates from areas with excess moisture, such as basements, bathrooms, or areas affected by water damage. Even if visible mold is not present, the consistent smell could be a sign that mold is growing in hidden areas like behind walls or under flooring.

Common Sources of Musty Odors:

  • Damp basements or crawl spaces
  • Leaking pipes or plumbing fixtures
  • Poorly ventilated bathrooms
  • Water-damaged drywall or insulation

Identifying Dark Spots?

Black mold often appears as dark greenish-black spots on surfaces such as walls, ceilings, and floors. It may also develop on materials like wood, carpet, or drywall. This discoloration can spread quickly in moist environments and should not be ignored.

Where to Check for Visible Mold:

  • Corners of rooms with high humidity levels
  • Window sills exposed to condensation
  • Areas around leaky pipes or water stains
Material Appearance of Mold Growth
Drywall Dark patches, irregular shapes
Wood Black streaks or rings
Carpets Greenish-black spots

How a Mold Removal Company Deltona FL Can Help with Increased Allergy Symptoms

Prolonged exposure to black mold can trigger allergy-like symptoms even in individuals without previous sensitivities. Common symptoms include sneezing, runny nose, itchy eyes, and nasal congestion. These symptoms often worsen when you spend more time indoors and subside when you leave the affected space.

Health Symptoms to Monitor:

  • Frequent coughing or sneezing
  • Irritation in the throat and nasal passages
  • Skin rashes or redness

If multiple members of your household experience these symptoms simultaneously, it may indicate poor indoor air quality caused by hidden mold growth.

High indoor humidity provides an ideal environment for toxic black mold to thrive. If your home consistently has humidity levels above 60%, it increases the likelihood of condensation forming on surfaces—creating perfect conditions for mold growth.

Tips for Monitoring Humidity:

  • Use a hygrometer to measure indoor humidity levels.
  • Keep relative humidity between 30%-50%.
  • Invest in a dehumidifier for damp rooms like basements.

Past water damage—such as flooding or long-term leaks—can lead to undetected black mold behind walls or underneath flooring materials. Stains on ceilings and walls are clear indicators that moisture has seeped into structural components where black mold might be developing unnoticed.

Areas Prone to Moisture Build-Up:

  • Roofs with leaks
  • Underneath kitchen sinks
  • Around bathtubs and showers

Addressing any signs of water damage promptly can help prevent future issues with toxic black mold growth.

By recognizing these early warning signs, homeowners can act quickly to address potential problems before they escalate into more significant health risks or costly repairs. Regular inspections and maintaining proper ventilation are key steps toward preventing toxic black mold infestations in your living space.

Molds in the bathroom caused by dirty water leaking from the upper floor Molds in the bathroom caused by dirty water leaking from the upper floor black mold stock pictures, royalty-free photos & images

The Health Risks and Dangers of Toxic Black Mold Exposure Explained

Toxic black mold, scientifically known as Stachybotrys chartarum, poses significant health risks when present in indoor environments. These toxic compounds can have severe effects on human health, especially for individuals with pre-existing conditions or weakened immune systems.

Common Health Symptoms of Black Mold Exposure

Exposure to black mold can lead to a variety of symptoms, many of which overlap with other health conditions. Recognizing these signs promptly is essential for safeguarding your well-being.

  • Chronic coughing or sneezing
  • Difficulty breathing or shortness of breath
  • Nasal congestion and sinus irritation
  • Skin rashes and itching
  • Watery, red eyes
  • Runny nose
  • Headaches or migraines
  • Memory problems and difficulty concentrating (“brain fog”)
  • Dizziness
  • Fatigue and lethargy
  • Nausea or vomiting in severe cases

Children, elderly individuals, and those with asthma or allergies are particularly vulnerable to these effects. Prolonged exposure can lead to more severe complications, including permanent respiratory damage.

Long-Term Health Risks from Chronic Exposure

Health Risk Potential Effect
Asthma Development May trigger asthma in individuals who previously did not have it.
Chronic Respiratory Issues Prolonged inflammation leading to reduced lung function.
Weakened Immune System Increased susceptibility to infections and illness.
Neurological Damage Long-term cognitive impairments associated with mycotoxin exposure.

Moreover, individuals with autoimmune disorders may experience aggravated symptoms due to the heightened stress on their immune systems.

Why Black Mold Is Dangerous

The primary reason black mold is so hazardous lies in the release of mycotoxins into the air. These microscopic particles can easily be inhaled or absorbed through the skin, leading to systemic reactions in the body. Mycotoxins are known to suppress immune function and cause cell damage over time if exposure persists.

Additionally, black mold thrives in damp environments such as basements, bathrooms, and areas affected by water damage. This makes it difficult for homeowners to detect early before significant growth occurs.

Who Should Be Concerned?

  • Infants and young children
  • Pregnant women
  • Elderly individuals
  • People with existing respiratory conditions (e. g.
  • Individuals undergoing chemotherapy or treatments that suppress immunity

Preventing Health Risks Through Early Detection

  1. Regularly inspect areas prone to moisture accumulation.
  2. Address leaks or water damage immediately.
  3. Use dehumidifiers in humid regions to maintain indoor humidity levels below 50%.
  4. Hire a professional if you suspect extensive mold growth within walls or ceilings.

By staying vigilant about potential symptoms and taking proactive measures against mold proliferation, you can significantly reduce health risks associated with toxic black mold exposure.

The Health Risks and Dangers of Toxic Black Mold Exposure Explained

Toxic black mold, scientifically known as Stachybotrys chartarum, is a type of fungus that thrives in damp, humid, and poorly ventilated environments. Its presence in homes and buildings can have serious health implications, particularly for vulnerable individuals such as children, the elderly, and those with pre-existing health conditions. Below is an overview of the various risks associated with toxic black mold exposure.

How Black Mold Affects Health

Exposure to black mold can lead to a range of symptoms that vary depending on the individual’s sensitivity, length of exposure, and the concentration of mold spores in the air.

  • Persistent coughing or sneezing
  • Difficulty breathing or shortness of breath
  • Nasal congestion and sinus infections
  • Skin rashes or hives
  • Red, itchy eyes
  • Throat irritation
  • Chronic Symptoms (from prolonged exposure)
  • Fatigue or lethargy
  • Frequent headaches or migraines
  • Worsening asthma symptoms in individuals with pre-existing conditions

Severe Health Risks in Prolonged Exposure

Over time, continuous exposure to toxic black mold can lead to more severe complications.

  • Neurological Issues: The mycotoxins produced by black mold spores are neurotoxic. This means they can potentially impair brain function over time. Symptoms may include mood swings, memory loss, confusion, or difficulty concentrating.
  • Immune System Suppression: Individuals exposed to high levels of mycotoxins might experience weakened immunity. This can lead to increased susceptibility to infections.
  • Pulmonary Hemorrhage: Though rare and primarily affecting infants and small children, prolonged exposure has been linked to bleeding in the lungs.
Symptom/Condition Potential Cause Who’s Most At Risk?
Allergic reactions Mold spore inhalation Allergy-prone individuals
Sinus infections Inflammation due to airborne particles Those with sinus issues
Neurological problems Mycotoxin toxicity Prolonged exposure cases
Asthma exacerbation Airborne irritants Asthmatic individuals

Vulnerable Populations at Higher Risk

  1. Young Children & Infants:Developing immune systems make children particularly vulnerable.
  2. Elderly Individuals:Age-related immune decline increases sensitivity.
  3. Immunocompromised Individuals:People undergoing chemotherapy or living with autoimmune diseases face heightened risks.
  4. People With Chronic Respiratory Conditions:Conditions like asthma or chronic bronchitis are likely to worsen upon exposure.

Preventive Measures

  • Regularly inspect damp areas like basements and bathrooms for signs of mold growth.
  • Use dehumidifiers in humid climates or poorly ventilated spaces.
  • Address water leaks promptly—whether from ceilings, walls, or plumbing fixtures.
  • Ensure proper ventilation in moisture-prone areas such as kitchens and laundry rooms.

Toxic black mold poses a serious threat not only to property but also to human health if left unchecked. Understanding its associated dangers is critical for timely intervention and prevention efforts within your home environment.

Mold Growth on Wall and Damp Stained Wood Door Mold Growth on Wall and Damp Stained Wood Door black mold stock pictures, royalty-free photos & images

Effective Mold Remediation Deltona FL: How to Identify and Address Black Mold

Identifying and addressing black mold in your home is crucial for maintaining a safe and healthy living environment.Stachybotrys chartarum, thrives in damp, humid conditions and can pose serious health risks if left untreated. Below is a guide to help you confirm the presence of black mold and take appropriate action.

Step 1: Recognize the Signs of Black Mold

  • Musty Odor: A persistent earthy or damp smell, especially in basements, bathrooms, or under sinks.
  • Visible Growth: Dark greenish-black spots or streaks on walls, ceilings, floors, or other surfaces prone to moisture.
  • Water Damage: Areas with consistent moisture issues like leaks, condensation buildup, or water-stained walls are prime locations for mold growth.
  • Increased Allergies: Symptoms such as sneezing, coughing, skin irritation, or watery eyes may worsen indoors due to airborne mold spores.

Step 2: Inspect Problematic Areas

Perform a thorough inspection of areas susceptible to moisture accumulation.

Area What to Check For
Bathrooms Shower tiles/grout, under sinks/cabinets
Kitchens Refrigerator seals, beneath dishwashers/sinks
Basements/Crawlspaces Leaks near plumbing pipes; damp corners
Attics Roof leaks; insulation damage

Use a flashlight to thoroughly check dark corners and hidden spaces.

Step 3: Conduct a Mold Test

  1. Purchase an At-Home Mold Test Kit: These kits allow you to collect samples from your home for laboratory analysis.
  2. Hire a Professional Inspector: A certified professional can conduct air quality testing and identify specific types of molds present.
  3. Check Humidity Levelsusing a hygrometer—black mold thrives when indoor humidity exceeds 60%. Aim for levels between 30–50%.

Step 4: Address the Source of Moisture

  • Fix leaky pipes immediately.
  • Improve ventilation with exhaust fans in bathrooms/kitchens.
  • Use dehumidifiers in high-humidity areas.
  • Ensure gutters direct water away from your home’s foundation.

Without eliminating excess moisture sources first ensures reoccurrence despite cleaning efforts.

Do Not Attempt DIY Removal If:

  • The affected area exceeds 10 square feet– consult professionals instead per EPA recommendations .

Otherwise,

Protective Measures Required Cleaning(Surface).

What to Do If You Suspect Black Mold: A Step-by-Step Guide

Discovering or suspecting black mold in your home can be stressful, but addressing the issue promptly is crucial for safeguarding both your property and your health. This step-by-step guide outlines the necessary actions you should take if you believe black mold may be present.

Start by identifying areas in your home where mold growth might occur. Black mold thrives in damp, humid, and poorly ventilated spaces.

  • Bathrooms: Around sinks, tubs, and showers.
  • Kitchens: Under sinks or behind appliances prone to leaks.
  • Basements: Near pipes, walls, or flooring with water damage.
  • HVAC Systems: Inside ducts or around vents if moisture has accumulated.

Look for visual signs such as dark green or black patches on walls, ceilings, or floors. Pay attention to musty odors as they often signal hidden mold.

Mold cannot grow without moisture.

  • Leaky pipes
  • Roof leaks
  • Condensation on windows
  • Flooding incidents

Fixing these issues is critical for preventing further growth.

Black mold can release spores into the air that may trigger respiratory irritation or other health symptoms.

  • Wear gloves to prevent skin contact.
  • Use an N95 respirator mask to avoid inhaling spores.
  • Put on safety goggles for eye protection.
  • Cover exposed skin with long sleeves and pants.

Avoid disturbing visible mold unless you’re properly equipped since this could release more spores into the environment.

  1. Purchase a DIY mold testing kit from a hardware store.
  2. Collect samples according to the instructions provided in the kit.
  3. Send samples to a lab for analysis or use a kit with rapid results.

Alternatively, hire a professional mold inspector who will use advanced tools like moisture meters and infrared cameras to detect hidden growth.

For small areas (less than 10 square feet), you may be able to handle removal yourself using household cleaning supplies like bleach solutions or commercial-grade products labeled for mold remediation purposes.

Scenario Action Recommended
Mold covers more than 10 square feet Hire certified remediation experts
Mold infestation originates from flooding Professional help is essential
Family members are experiencing health complications Consult specialists immediately

Attempting large-scale removal without proper training could exacerbate contamination and pose greater risks.

Certified professionals have access to specialized equipment designed for effective containment and eradication of toxic molds like HEPA vacuums and air scrubbers. They’ll also ensure surrounding areas remain unaffected during treatment processes by sealing off impacted zones with plastic sheeting under negative pressure systems.

  1. Verify certifications (such as IICRC certification).
  2. Check online reviews and request references from previous clients.
  3. Obtain written estimates detailing services provided upfront—this avoids unexpected costs later on.
  • Use dehumidifiers regularly if humidity levels exceed 50%indoors.
  • Install exhaust fans in kitchens/bathrooms where steam builds frequently.
  • Repair all existing leaks immediately after detection—procrastination leads directly back into recurrence issues over time!

By staying proactive post-remediation efforts alongside consistent maintenance routines moving forward ensures ongoing safety peace-of-mind alike homeowners renters alike everywhere alike overall.


Tags: